Odour delivery (AGO and mAGO)
The air, gas and odour delivery module (AGO) puffs air or odour into individual tubes, as a stimulus or to probe arousal. It uses the shared electronics and comes in two forms:
- AGO (MODULE 2): ten solenoid valves;
- mAGO (MODULE 1): the sleep deprivation module with its ten motors, plus ten valves, so that the same flies can be woken mechanically or with odour.
It replaces an earlier AGO built with LEGO pneumatic valves and servos. Compared with that version, it:
- uses solenoid valves (the 4.5 V version of these valves, which draw 260 mA at 5 V);
- needs little piping, because the splitters are built into the printed base;
- uses the same electronics as the sleep deprivation module.
The valve base
Section titled “The valve base”All parts are 3D printed and on Onshape:
- valve base, with slots for ten valves, five on each side;
- joiner input pipe;
- for the mAGO, the N20 motor holder and covers and the base for the motors.
Each valve has three ports. When the valve is off, port 1 connects to port 3; when it is on, port 1 connects to port 2.
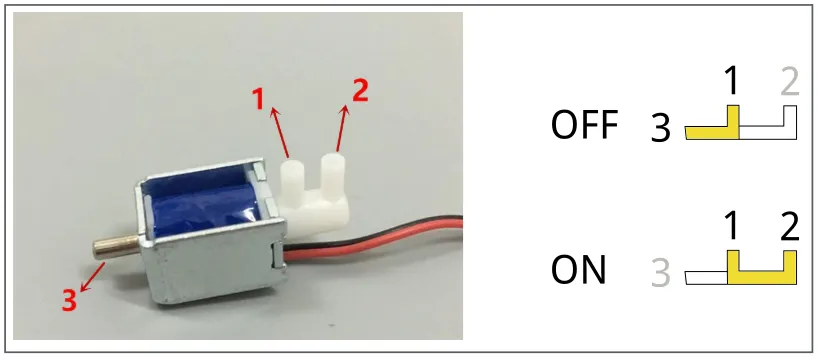
Regular configuration
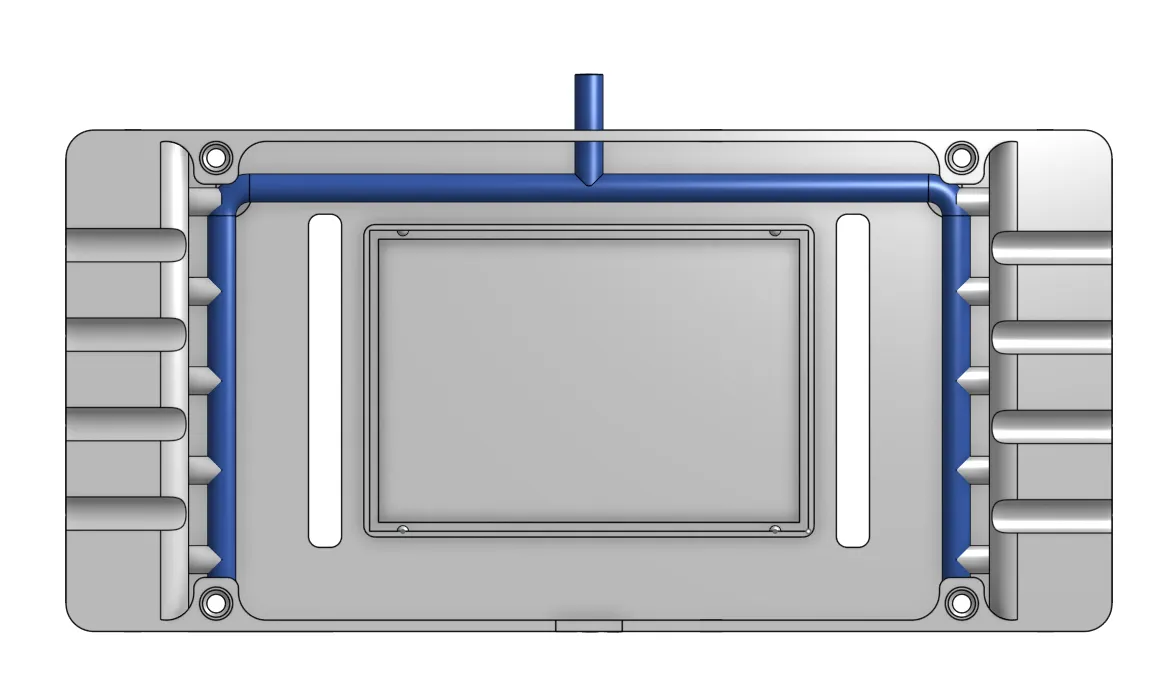
Section titled “Regular configuration”- port 3 → waste pipe
- port 1 → input pipe
- port 2 → flies
The waste pipe (blue below) is built into the printed case and has one outlet, 5 mm in outer diameter, which takes flexible silicone tubing. Waste is collected better with a pump that applies negative pressure.
Continuous-flow configuration
Section titled “Continuous-flow configuration”- port 1 → flies
- port 2 → odour input
- port 3 → air input
The flies then feel a constant flow: air when the valve is off, odour when it is on. This has two drawbacks. Unless it is collected, the odour leaves the tubes and builds up in the incubator; and the flow must be adjusted by trial, because flies are sensitive to it and move less when it is too strong.
The input pipe
Section titled “The input pipe”The input pipe adaptor (blue below) is printed separately and slots onto port 1 of the valves. Its two ends join the input pipe on the other side with flexible silicone tubing; one of the two joints can be broken with a T connector to bring in the odour. The joint connector has an outer diameter of 5.5 mm, so a 5 mm inner-diameter silicone tube stretches tightly over it.
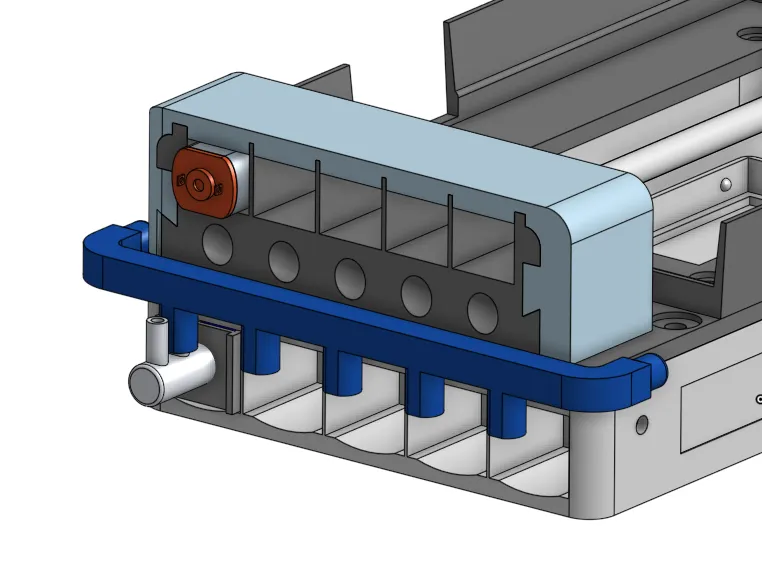
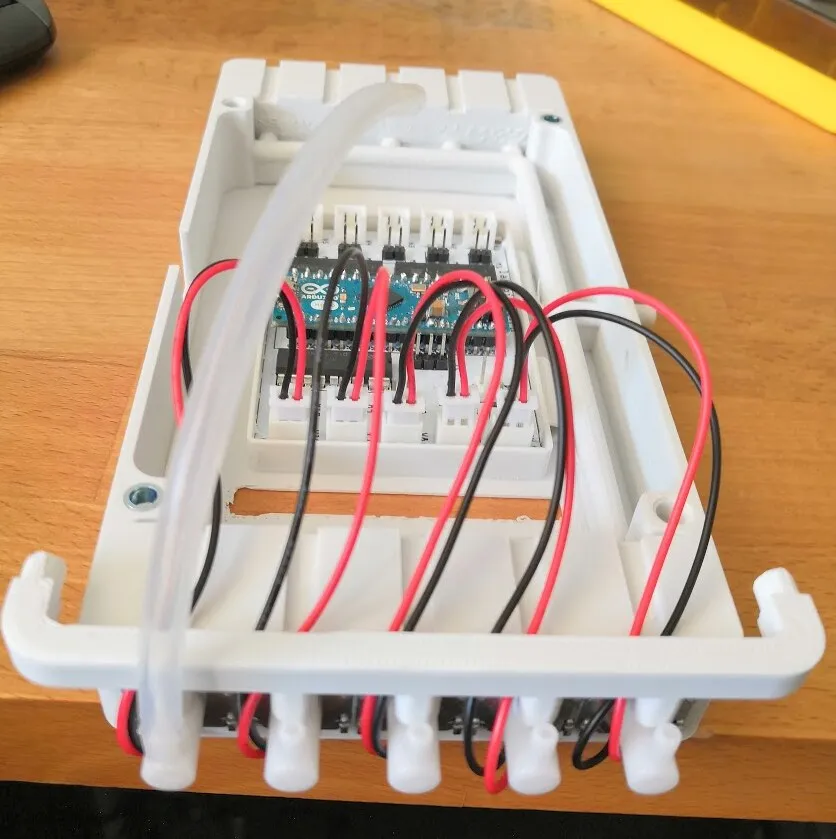
The exhausts are collected automatically and the joint pipe feeds the inputs. Joint pipes can be reused between experiments, but use a different one for each odour.
Valves, motors and tubes
Section titled “Valves, motors and tubes”The firmware puts valves on the even channels (0, 2, …, 18, connectors V1–V10) and motors on the odd channels (1, 3, …, 19, connectors M1–M10).
AGO (MODULE 2)
Section titled “AGO (MODULE 2)”The AGO stimulator works with an arena of ten tubes:
| ROI | 1 | 2 | 3 | 4 | 5 | 6 | 7 | 8 | 9 | 10 |
|---|---|---|---|---|---|---|---|---|---|---|
| Valve channel | 0 | 10 | 2 | 12 | 4 | 14 | 6 | 16 | 8 | 18 |
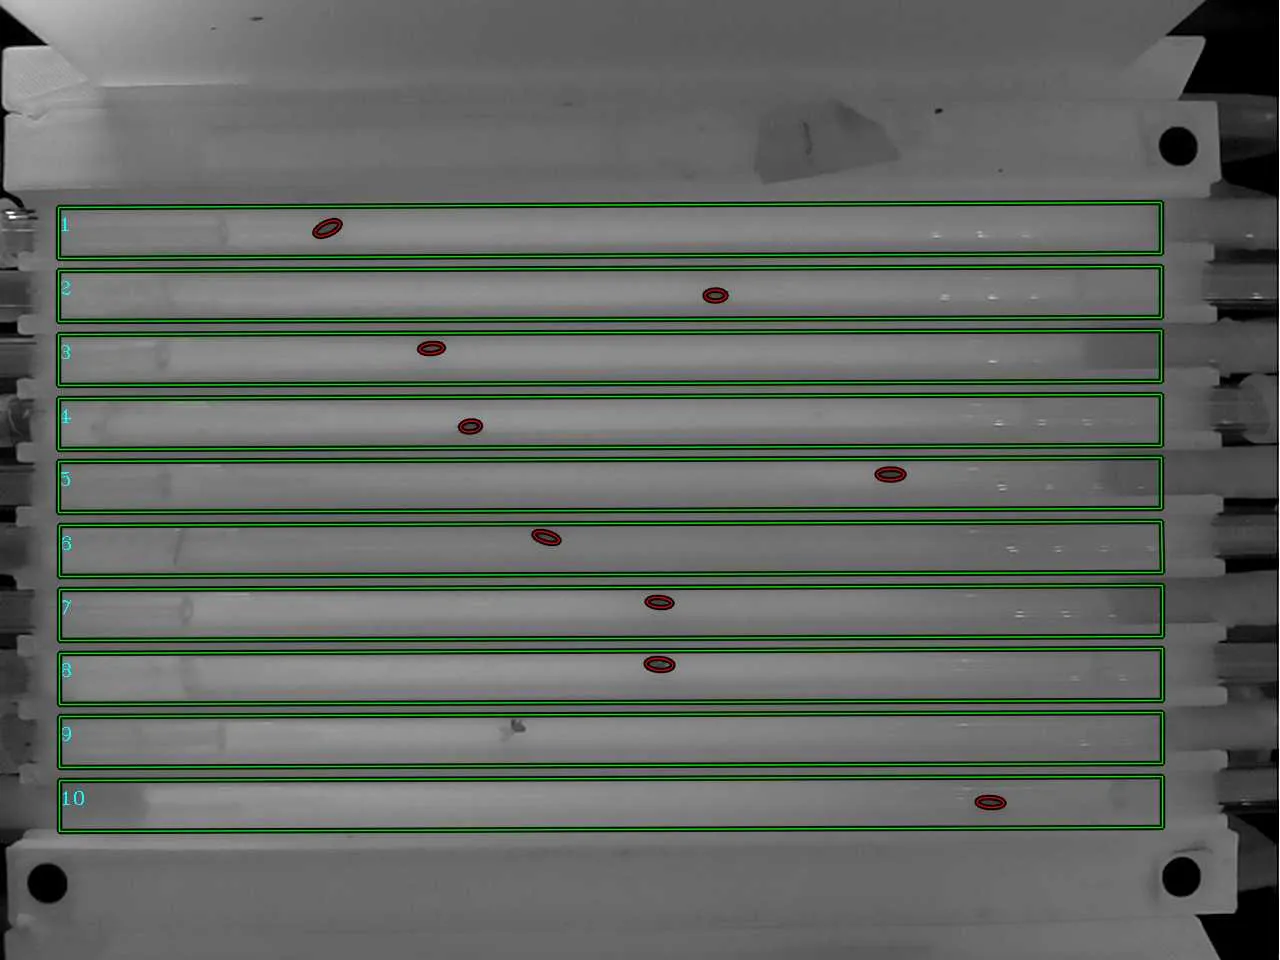
Its settings are the inactivity threshold (velocity_correction_coef, min_inactive_time), the length of the puff (pulse_duration, in ms), stimulus_probability, and number_of_stimuli, the number of puffs after which no more are given (0 for no limit).
mAGO (MODULE 1)
Section titled “mAGO (MODULE 1)”The mAGO stimulator works with a 20-tube arena:
- ROIs 1, 3, 5, 7 and 9 can be stimulated with both motors and valves;
- ROIs 12, 14, 16, 18 and 20 with motors only;
- ROIs 11, 13, 15, 17 and 19 with valves only;
- ROIs 2, 4, 6, 8 and 10 with nothing.
| ROI | 1 | 3 | 5 | 7 | 9 | 11 | 12 | 13 | 14 | 15 | 16 | 17 | 18 | 19 | 20 |
|---|---|---|---|---|---|---|---|---|---|---|---|---|---|---|---|
| Motor channel | 1 | 3 | 5 | 7 | 9 | 11 | 13 | 15 | 17 | 19 | |||||
| Valve channel | 0 | 2 | 4 | 6 | 8 | 10 | 12 | 14 | 16 | 18 |
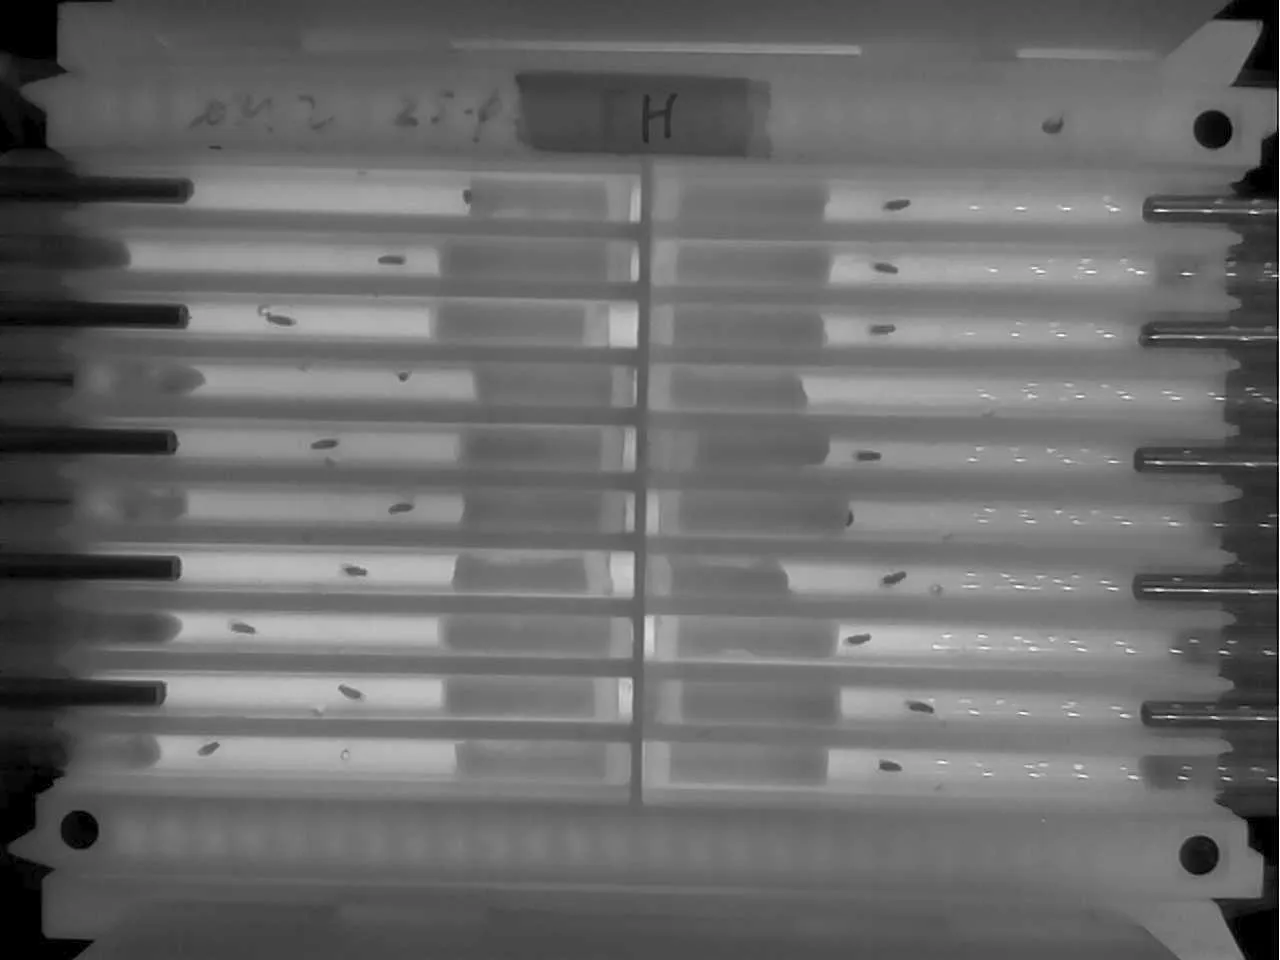
Its stimulus_type setting chooses motors (1) or valves (2); the other settings are as for the AGO.
Odour containers
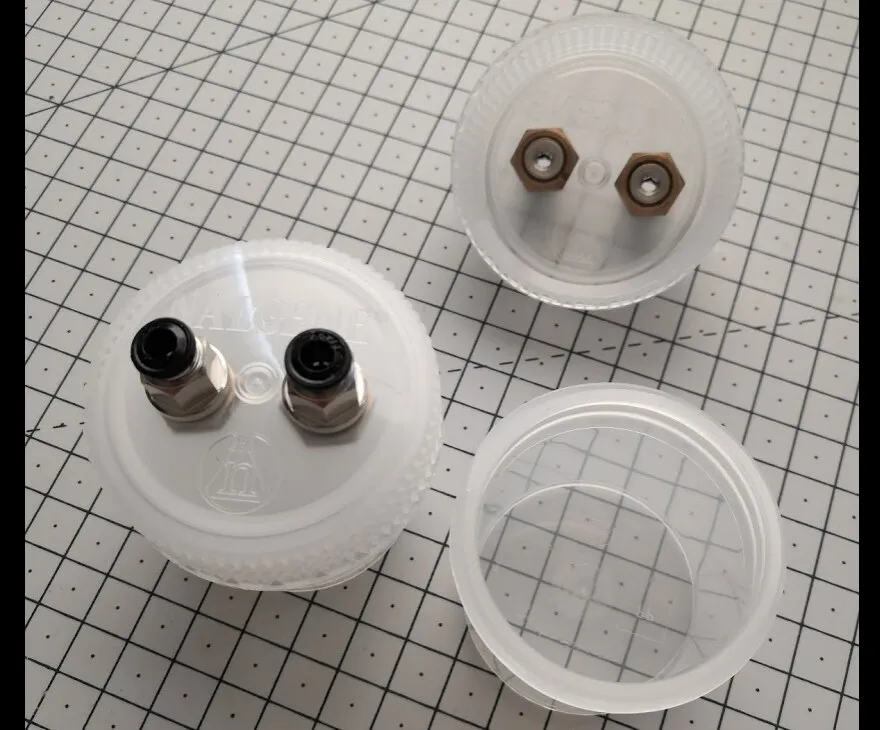
Section titled “Odour containers”The lab uses 60 ml polypropylene jars (Nalgene, catalogue number 2118-0002, from Thermo Fisher):
- With a small wood bit, make two 3 mm pilot holes in the cap, about 12 mm from the centre.
- Enlarge each hole with an 8 mm bit, then widen it until a push-in compression fitting (RS 176-1276) fits.
- Secure the fittings from the other side with 1/8 NPT locknuts (JTM Plumbing), tightened with a socket set.
- Put the odour in the jar, close the cap, and wrap it with a couple of turns of Parafilm or grafting tape (example).